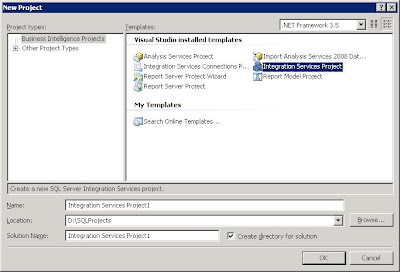
Step 1 Create an SSIS package from SQL Server Business Intelligence development studio:
In maintenance for our database backups, We had to schedule backups and copy the backup files to a remote computer for our System Administrator to take the files to a tape. I thought SSIS could be helpful here. The key point in my post is to run the SQL Server Agent with a domain user account and give permissions on the destination folder at remote system for backup. And make sure that the user account password never expires.
To create a SSIS Package open SQL Server Business Intelligence Development Studio -
Create project from template - Business Intelligence Projects > Integration Services Project
From tool box, drag the task ‘Backup Database Task’ (under Maintenance Plan Tasks) to create a plan for backup of the database to a path.
From tool box drag – ‘File System Task’, to copy the backup file from the source (which contains the backup file) to destination select operation from one of the ‘Copy directory’ or ‘Copy File’. And you can also delete the contents of the destination if you don't want the old backups with a another 'File System Task' as Clear Directory.
Check for Permissions on destination if it is on remote system:
Make sure that the account on which the SQL Server Agent is running should have the permissions on the destination folder in the remote computer (Check the sharing permissions and security tabs in the properties window of the destination folder from windows explorer). A domain user will work for giving permissions on the network shared drive.
You can check the user account on which the SQL Server Agent is working from the Services under Computer Management (right click on My Computer and click Manage).
Build Package:
Build the project to create the package to schedule in SQL Server Agent.
Step 2 Scheduling the SSIS Package:
Open SQL Server Management Studio, in the object explorer window find SQL Server Agent (it should be running) and expand. Right click on Jobs and click on ‘New Job’ to open the wizard.
Enter name and other details in ‘General’ tab. In steps click ‘New...’, it will open the window to add our package. Select ‘SQL Server Integration Services Package’ from Type and File System from ‘Package source’. And browse for the package path from the below. Click ‘OK’.
You can schedule the package from Schedules tab on left to run the package at a scheduled time.


